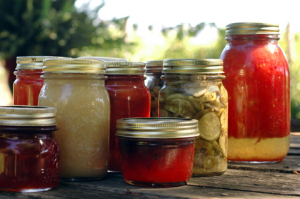
The process of preserving, or putting up, fruits and vegetables is demystified in this step-by-step guide to the ins and outs of hot water canning.
This is a general guide for hot water bath canning of acidic foods such as fruits to make preserves, jellies, jams, etc. Non-acid foods such as vegetables and meats must be processed by the pressure canning method. Consult the specific instructions that accompany your brand of mason jars for the exact procedures as they may differ between manufacturers. The process outlined below is suitable for Ball brand jars.
Supplies
Very large stock pot or canner pot
Wire rack to fit in the bottom of the pot
Wire rack to cool and rest processed jars on
Sturdy tongs for lifting and lowering filled jars
Candy thermometer
Small ladle
Small stiff, non-metallic spatula or bamboo skewer
Paper towels
Mason jars, lids and bands
Method
1. Wash jars, lids, bands, and all equipment in hot soap water or run through the dishwasher. Only work with enough jars to use up the amount of food in the batch you are currently working with.
2. Set up the pot. Fill the pot halfway with cold water and move to stove. Place a wire rack on the bottom of the pot. Using tongs, pick up and stand the empty jars upright on the rack, allowing them to fill with water as you place them in the pot. Using a tea kettle or a large saucepan, add more water to the pot so that the water level is at least 1″ above the top rim of the jars, but ideally 2″ or more is better. Using tongs, add the lids to the pot. Position them carefully so they don’t slip under the rack. It is not necessary to put the bands in this prep bath. On high, heat the pot to 180 degrees. Maintain it at that temperature for at least 10 minutes and until ready to start canning your food. Do not allow the pot to boil. If the lids are subjected to high temperatures the sealing compound will activate and your jars will not seal later when you process them.
3. When your recipe is ready to can, keep it hot as you fill the jars and continue to keep the canning pot at 180 degrees while completing this step as well. Using tongs, remove a jar from the pot and hold it upside down over the pot to allow excess water to drip away. Place the jar on the counter and using a ladle, fill the hot jar with your hot food, leaving ¼” of headspace from the top. With the non-metallic spatula or a bamboo skewer, work your way around the perimeter of the jar in an up and down motion to remove any air pockets that might have occurred while filling the jar. Adjust headspace if necessary and wipe the rim with a clean, damp paper towel to remove any debris. Using tongs, remove a lid from the pot and position on the top of the jar. Screw on a band just to the point of resistance. DO NOT TIGHTEN. Air must be allowed to escape during processing to create a vacuum seal. The passage is one way – air will escape from the jar, but water will not enter it. Using tongs, pick up the filled and closed jar and place it carefully into the canning pot, keeping it upright at all times. Repeat until all jars are filled.
4. Increase the heat, cover and bring the pot to a boil. This can take as long as 40 minutes depending on the size of your pot and jars. Observe carefully and do not mistake the escaping air from the jars as the water coming to a boil. When a full rolling boil occurs, allow the pot to boil for 10 minutes.
5. Turn off the heat and remove the lid. Carefully remove the jars from the pot with the tongs, taking care to keep them facing upright at all times and not allowing them to tilt or be turned upside down. Allow the jars to rest on a cooling rack for 12 – 24 hours. You will notice that the bands are very loose when they come out of the bath. Do NOT tighten them. As the jars cool they will vacuum seal and you may here a “ping” sounds from the jars, this is normal.
6. After the resting period, remove the bands and test the seal by grasping the lid and trying to gently pull it off. It should feel very secure and appear to be dented inwards. This is a good seal. Wipe the jars off with a damp cloth and store in a cool dark place for up to a year. Jars that did not seal properly should be stored in the refrigerator and will keep for about 6 weeks, depending on the contents.
7. It’s not necessary to store the jars with the bands screwed on. They may actually rust over time and may end up being difficult to remove. If giving as a gift, lightly screw on a band as it will be needed to close the jar again once it has been opened. Cover the top with a piece of fabric or parchment paper, secured with a ribbon for a homemade gift.
This is an overview of the basic method for processing acidic foods and is not meant to replace specific manufacturer or recipe instructions. Please be sure to consult your recipe and canner’s specific instructions.


Hello, nice site!
Thank you for “bein there” we’ve moved so much, misplaced the instructions, this is almost as old as me (I think). Now to find the recipes. Thanx again!!!
How much water do you put in the canner???
Generally, there should be enough water to be about two inches above the tops of the jars. The jar or canner manufacturer may indicate a specific level, so it’s best to refer to any instructions that came with your canning supplies.
Hi
I just canned some bread and butter pickles and I did not use a hot bath after, its been two days…can I still do one… if not they turned out two salty… might have to toss anyway
Any info will help…Thank you
Pam